A lot of developers have asked me recently about OData compatibility with ASP.NET Core 3.0 and again with .NET Core 3.1 after it’s very recent release.
This demand became more and more critical with the recent announcement from the .NET team around .NET Core 2.2 reaching the end of its life on Dec 23rd of this year.
And because of all of that, the OData team at Microsoft have been working diligently in the last few months to ensure a stable release of OData that supports .NET Core 3.1 makes it out to the public as soon as possible.
And while the final release might take a bit longer to be production-ready, the OData team has recently released a beta version for developers to experiment with it, learn about it’s capabilities and possibly build some demo APIs and leverage it in some POCs.
In this article, I’m going to show you how you can build a modern ASP.NET Core 3.1 API with OData by simply following very few simple steps.
Prerequisites
In order for you to be able to create this demo on your local machine, you want to make sure that you have Visual Studio 2019 version 16.4 or later so you can leverage the capabilities of .NET Core 3.1, if you install that particular version of VS 2019 you will not need to install .NET Core 3.1 separately as it comes with the bundle.
You can check the current version of your Visual Studio 2019 by going to top menu, then Help then About Visual Studio as shows in the following screenshots:
Image may be NSFW.
Clik here to view.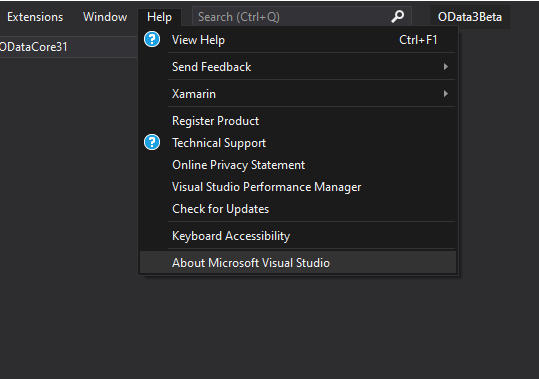
Image may be NSFW.
Clik here to view.
If your current version of Visual Studio 2019 is lower than 16.4, you can upgrade your Visual Studio instance by clicking on the bell icon at the lower right corner of your Visual Studio instance then selecting to upgrade your Visual Studio as shows in the following screenshots:
Image may be NSFW.
Clik here to view.
Once you click the “More Details” link, it usually takes about 10 seconds and then you should be prompt with a dialog to upgrade your Visual Studio instance as follows:
Image may be NSFW.
Clik here to view.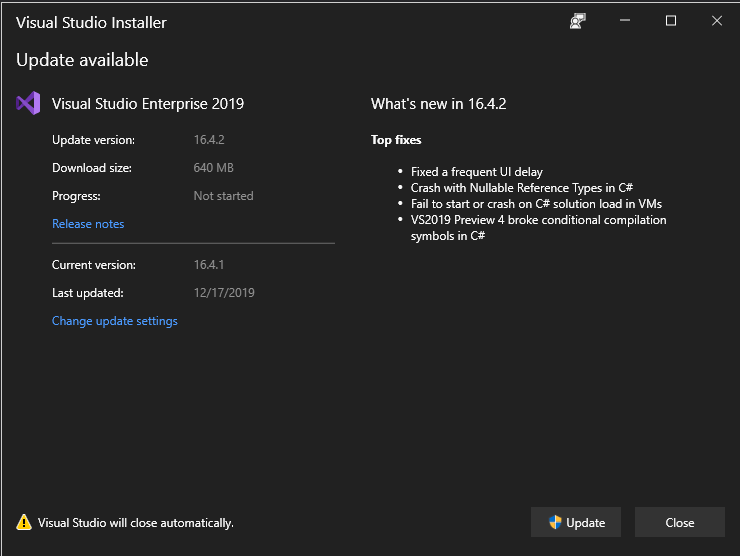
Please make sure you save all your work before you click the “Update” button as the process will require Visual Studio to close automatically, you will not be prompted to save your work before Visual Studio closes, you also want to make sure you have Admin permissions to be able to continue with that process.
Once the upgrade is done, now you are ready to build ASP.NET Core applications with .NET Core 3.1, let’s talk about setting your project up.
Setting Things Up
For starters, let’s create a new ASP.NET Core Web Application by either starting a new instance of Visual Studio or simply going to File -> New -> Project, you should be then prompted with the following dialog:
Image may be NSFW.
Clik here to view.
After selecting ASP.NET Core Web Application (with C#) click the Next button you will be prompted to create a new name for your project and then selecting the version and template of which your project should be based on as follows:
Image may be NSFW.
Clik here to view.
Image may be NSFW.
Clik here to view.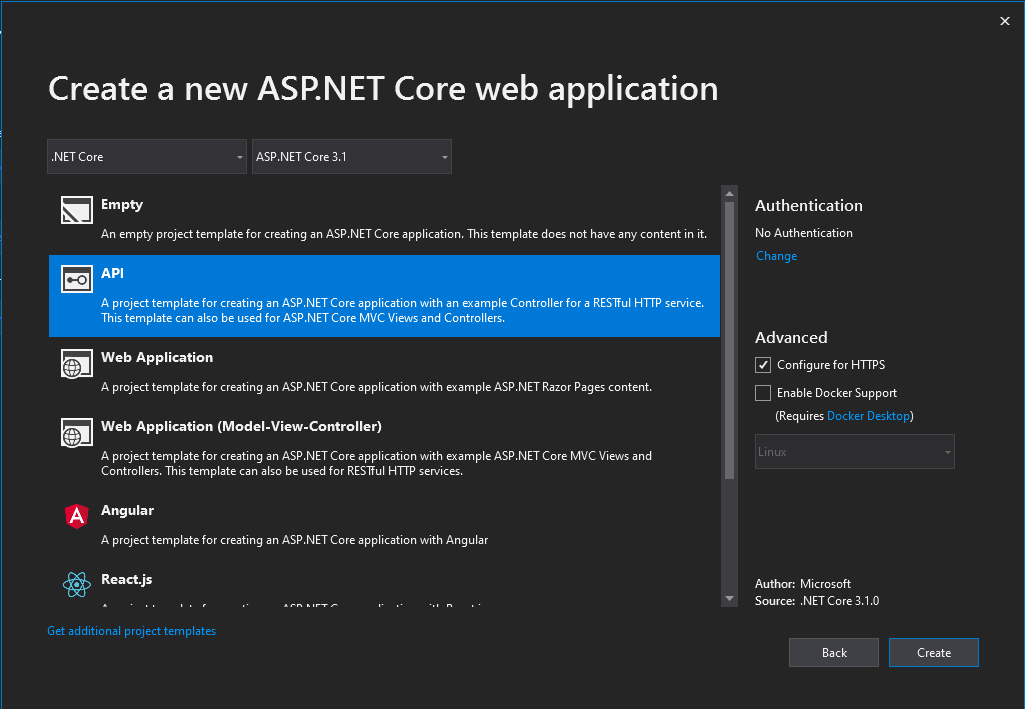
Please make sure you select ASP.NET Core 3.1 from the drop down menu at the top right side, and API as a template for your project then click “Create“.
Installing OData
Now that you have created a new project, let’s go ahead and install the beta release of OData for ASP.NET Core 3.1
There are two ways you can install the beta library depends on your preference, if you are a command line kind of developer, you can simply open the package manager console by clicking on the Tools top menu option, then Nuget Package Manager then Package Manager Console as follows:
Image may be NSFW.
Clik here to view.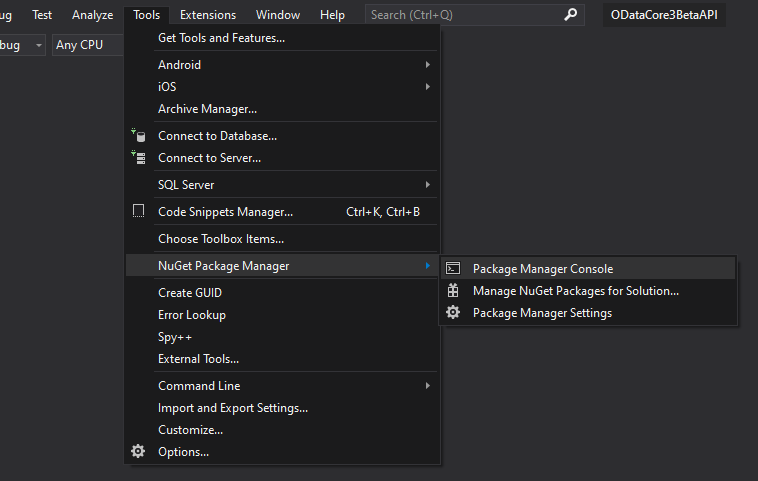
you will be prompted with a console window so you can type the following command:
PM> Install-Package Microsoft.AspNetCore.OData -Version 7.3.0-beta
If you don’t like using command lines, you can simply install the very same package by going to the exact same menu options we selected above, except you are going to choose Manage Nuget Packages for Solution instead of Package Manager Console the following dialog will appear so you can install the library as follows:
Image may be NSFW.
Clik here to view.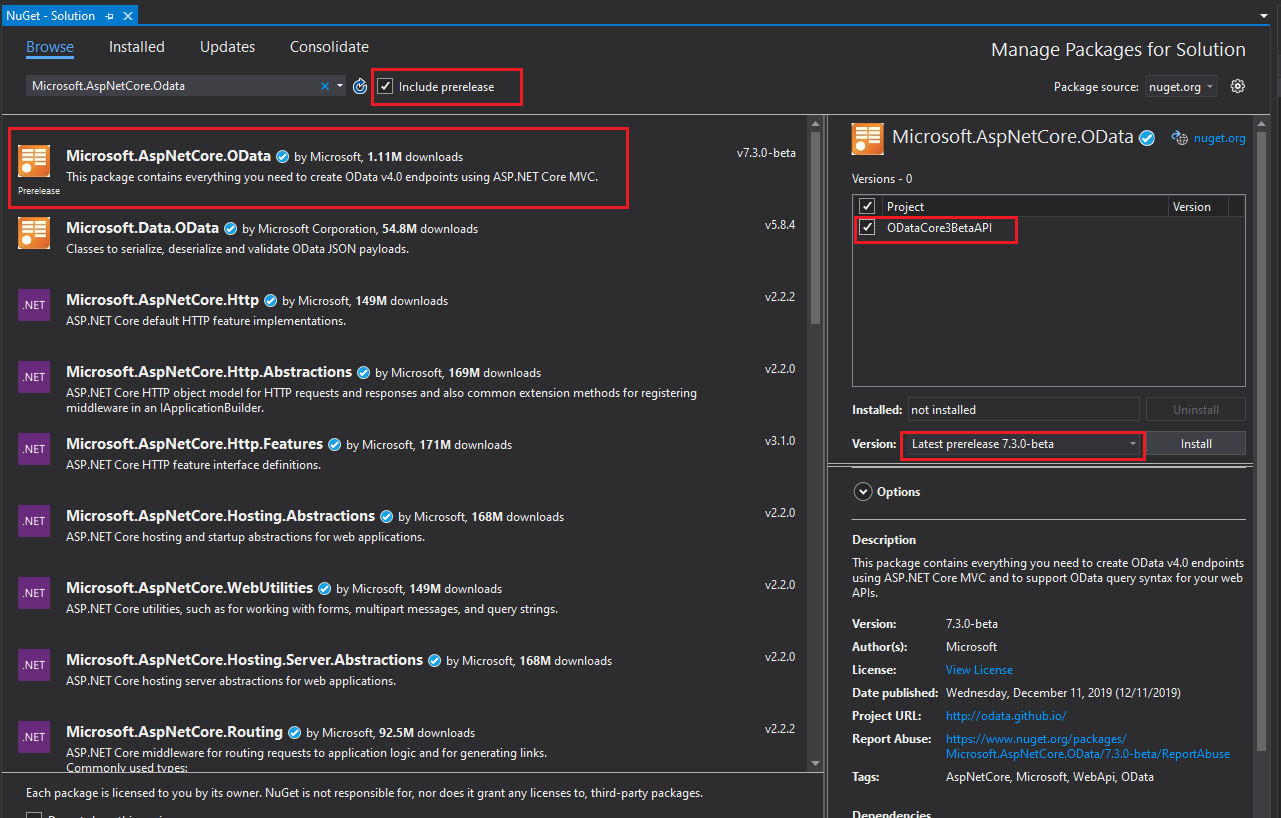
There are few things that I have highlighted in that screenshot that you need to pay attention to:
- You must check the “Include prerelease” so you can see the beta release of the nuget package.
- Search for Microsoft.AspNetCore.OData and select the first option.
- Select the project in which you want to install your library, in our case here since we have one project, it’s safe to just check the entire project.
- Make sure you select Latest prerelease 7.3.0-beta in the drop down menu on the right side before you click the Install button.
Models & Controllers
Now that we have OData installed, let’s create a Student model and create a controller to return a list of students as follows:
using System;

namespace ODataCore3BetaAPI.Models
{
    public class Student
    {
        public Guid Id { get; set; }
        public string Name { get; set; }
        public int Score { get; set; }
    }
}
Now let’s create a simple API controller that returns a list of students:
using System;
using System.Collections.Generic;
using Microsoft.AspNet.OData;
using Microsoft.AspNetCore.Mvc;
using ODataCore3BetaAPI.Models;

namespace ODataCore3BetaAPI.Controllers
{
    [Route("api/[controller]")]
    [ApiController]
    public class StudentsController : ControllerBase
    {
        [HttpGet]
        [EnableQuery()]
        public IEnumerable<Student> Get()
        {
            return new List<Student>
            {
                CreateNewStudent("Cody Allen", 130),
                CreateNewStudent("Todd Ostermeier", 160),
                CreateNewStudent("Viral Pandya", 140)
            };
        }

        private static Student CreateNewStudent(string name, int score)
        {
            return new Student
            {
                Id = Guid.NewGuid(),
                Name = name,
                Score = score
            };
        }
    }
}
Please notice that this controller is only created this way for a demo purpose, ideally your controller should return an IQueryable to achieve better performance and execute queries on your database server if you are retrieving your data from a database.
Final Step
Our final step here is to modify the startup.cs file to support OData, our code here will be very similar to our code from previous articles, let’s start with the ConfigureServices method in our startup.cs file as follows:
public void ConfigureServices(IServiceCollection services)
        {
            services.AddControllers(mvcOptions =>
                mvcOptions.EnableEndpointRouting = false);

            services.AddOData();
        }
You will notice a couple of changes in the above code, Adding OData which is just as similar as any other OData powered application.
The second change is disabling endpoint routing, let’s talk about that for a bit.
For starters, this is not an ideal situation, the final release of OData shall allow endpoint routing while supporting OData queries.
But for those who want to understand what endpoint routing setting is, especially for .NET Core 3.0 and above, here’s a quote from a previous post for Daniel Roth:
In ASP.NET Core 2.2 we introduced a new routing implementation called Endpoint Routing which replaces
IRouter-based routing for ASP.NET Core MVC. In the upcoming 3.0 release Endpoint Routing will become central to the ASP.NET Core middleware programming model. Endpoint Routing is designed to support greater interoperability between frameworks that need routing (MVC, gRPC, SignalR, and more …) and middleware that want to understand the decisions made by routing (localization, authorization, CORS, and more …).While it’s still possible to use the old
UseMvc()orUseRouter()middleware in a 3.0 application, we recommend that every application migrate to Endpoint Routing if possible. We are taking steps to address compatibility bugs and fill in previously unsupported scenarios. We welcome your feedback about what features are missing or anything else that’s not great about routing in this preview release.
And while endpoint routing is one of the most important upgrades to ASP.NET Core 3.0, with this beta release you could still leverage the power of OData without leveraging endpoint routing temporarily.
With that being said, let’s move on to the next step which is implementing a GetEdmModel method as we have done previously and change the routing implementing in the Configure method as follows:
public void Configure(IApplicationBuilder app, IWebHostEnvironment env)
        {
            if (env.IsDevelopment())
            {
                app.UseDeveloperExceptionPage();
            }

            app.UseHttpsRedirection();
            app.UseRouting();
            app.UseAuthorization();

            app.UseMvc(routeBuilder =>
            {
                routeBuilder.Select().Filter();
                routeBuilder.MapODataServiceRoute("odata", "odata", GetEdmModel());
            });

            //app.UseEndpoints(endpoints =>
            //{
            //    endpoints.MapControllers();
            //});
        }

        IEdmModel GetEdmModel()
        {
            var odataBuilder = new ODataConventionModelBuilder();
            odataBuilder.EntitySet<Student>("Students");

            return odataBuilder.GetEdmModel();
        }
I have intentionally left the app.UseEndPoints to show you what code you need to remove (again, temporarily for this beta release) and what code you need to add to leverage the power of OData.
And that should be the final step in this tutorial, now you can run you application and call your endpoint as follows:
https://localhost:44344/odata/students?$select=name
and the results should be as follows:
{
    "@odata.context": "https://localhost:44344/odata/$metadata#Students(Name)",
    "value": [
        {
            "Name": "Cody Allen"
        },
        {
            "Name": "Todd Ostermeier"
        },
        {
            "Name": "Viral Pandya"
        }
    ]
}
Final Notes
- Huge thanks to Sam Xu, Saurabh Madan and the the rest of the OData team on the great efforts they have made to produce this beta release, and as you are reading this article, the team continues to push improvements and features before announcing the final release of OData 7.3.0 for ASP.NET Core 3.1 which should have a long term support of 3 years.
- This beta release should not be used in any way shape or form for production environments, it’s mainly for POCs and demos.
- OData team should announce the final release of OData for .NET Core 3.1 sometime in the second quarter of 2020.
- You can follow up on the most recent updates for OData on this public github repository and this thread as well.
- This is a repository for the demo in this article.
If you have any questions, comments, concerns or if you are running into any issues running this demo feel free to reach out on this blog post, we are more than happy to listen to your feedback and communicate your concerns.
Update
- Just a couple of days ago, OData team has released the final version of OData 7.3.0 to support .NET Core 3.1 you can find the package in here.
- OData team is working very closely with the .NET team to address the endpoint routing issue, we will announce the changes as soon as they become ready.
- You can now use OData in your production environment as it passed it’s beta stage and is now ready for production-ready applications.
The post Experimenting with OData in ASP.NET Core 3.1 appeared first on OData.